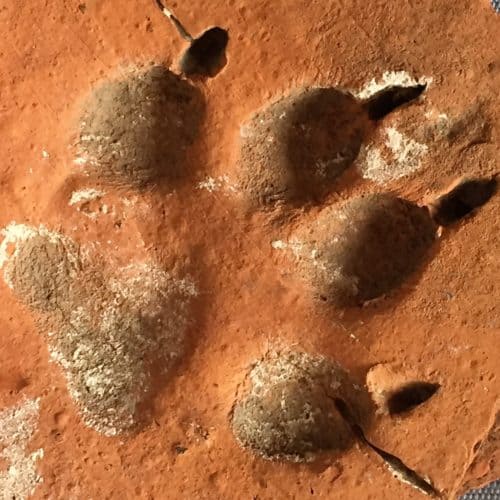
Romans activity 4: get off my tiles!
The class investigate images of animal paw prints, human footprints and stamps on Roman tiles and imagine how they came to be there.
They explore the work of a Roman tile maker and have fun recreating in role play, or in a piece of creative writing, the incident that led to the paw prints or footprints being made.
Finally, they make their own mini Roman tiles, complete with human or animal footprints, a CLBR motif or their own personal Roman potter’s stamp.
Image copyright: Canterbury Archaeological Trust
Learning objectives
Increased knowledge and understanding of archaeology, Folkestone Roman Villa and the life of a Roman tile maker.
Research skills.
Design Technology skills.
Curriculum links
KS1-2 History (Romans, Local History Study).
KS1-4 Design Technology (Making Roman tiles)
The class investigate images of animal paw prints and human footprints on Roman tiles from Folkestone Roman Villa in Learn with Objects Romans 5: tiles and imagine how they came to be there.
Roman tile makers created their tiles using damp clay, then left them outside to dry. When they were dry, Roman tiles were fired in a hot kiln to turn them into pottery. There are several Roman kilns known from Kent. Other tiles were imported, including from Gaul. Sometimes children or animals walked over the tiles as they were drying.
The children create a piece of creative writing or role play inspired by the question: What would the tile maker do if he saw them?
Here's one scenario:
Perhaps a young shepherd’s flock have escaped and are running all over the tiles. In trying to round them up, he and his sheep dog step on some too. The tile maker comes out…
Do they get caught and punished, or put to work to make up for the damage, or do they escape. What happens next? Children can also create their own scenario of how footprints got on the tiles!
Investigate different kinds of Roman building tiles, their uses and other kinds of information that might be found on them (e.g. stamps/maker's marks):
Floor tiles
Box flue tiles (used in heating)
Tegula/imbrex tiles (types of roof tile)
Pilae (pillar tiles) (used in bathhouse)
Ask children to research these types of tiles and present to the class what they have found.
Find out about pottery stamps, liked the mysterious CLBR stamps on some of the tiles from Folkestone. What might these letters mean? See Learn with Objects Romans 5: tiles to find out more.
Find out about the Roman hypocaust system:
https://www.bbc.co.uk/programmes/p01151qk
Here’s some information on box flue tiles.
https://www.thenovium.org/article/27359/Roman-box-flue-tiles
https://mudlarking.blogspot.com/2012/10/roman-box-flue-tiles-ad-43-410.html
Create Roman tiles
The children use terracotta-coloured self-hardening clay to recreate a range of Roman tile patterns, close-up details, or mini versions of the complete tiles.
These might include:
- Roman floor tiles (with partial or complete human or animal footprints, hobnail boot impressions, CLBR or tiler’s personal tile stamps)
- Box flue tiles or voussoir with patterns
- Overlapping Tegula and imbrex roof tiles
Top tip: Ask children with dogs to take a lump of clay home and impress their dog’s paw print into a freshly made tile (NB the clay must be kept air tight on the journey home to stop it drying out).
Children’s bare footprints can be impressed at school.
For hobnail boot impressions press the wrong end of a pencil into the damp clay in a shoe shaped pattern (copy an example of a hobnail impression on a Roman tile).
Mini tiles could be made to create a model Roman villa (or part of it). See Learn with Objects Romans activity 1 - a room with a view.

